Why Soundproofing Your Basement Matters
Even though basements are naturally quieter than upper levels, they’re not immune to sound transfer. Vibrations travel through framing, air ducts, and floors, creating unwanted noise. Soundproofing ensures privacy, clarity, and comfort — whether you’re watching movies, recording music, or just trying to focus during a Zoom call.
| Benefit | Impact |
|---|---|
| Improved Acoustics | Reduces echo and enhances sound quality for theaters, studios, or meeting rooms. |
| Noise Isolation | Prevents sound from leaking upstairs or into neighboring rooms. |
| Privacy & Comfort | Creates a calm, distraction-free environment ideal for work or relaxation. |
| Added Property Value | Soundproof basements appeal to buyers seeking entertainment or office-ready spaces. |
1. Start with the Right Insulation
Most homeowners assume any insulation will help block sound — but that’s a costly misconception. Standard fiberglass insulation controls temperature well, yet it barely affects sound transfer. For true acoustic protection, especially in basements, rockwool (mineral wool) is the gold standard. It’s denser, moisture-resistant, and engineered to absorb both airborne (voices, music) and impact noises (footsteps, dropped weights). This makes it ideal for home gyms, studios, and entertainment areas below ground.
- STC Rating: 45–50 when properly installed within standard 2×4 or 2×6 framing.
- Bonus: Naturally fire-resistant, mold-proof, and non-toxic — ideal for humid basement environments.
- Installation Tip: Cut to fit snugly between studs or joists without compressing, as compression reduces effectiveness.
- Thermal + Acoustic Combo: Provides superior heat retention while significantly reducing sound transmission.
- Durability: Doesn’t sag or settle over time like traditional fiberglass.
| Feature | Benefit |
|---|---|
| Rockwool (Mineral Wool) Insulation | Absorbs airborne and impact noise, offering superior soundproofing performance. |
| High STC Rating (45–50) | Blocks most household noises, including voices, TVs, and music from upper floors. |
| Fire + Mold Resistance | Ensures long-lasting performance and safety in humid, underground environments. |
| Thermal & Acoustic Efficiency | Improves comfort while maintaining stable indoor temperatures year-round. |
| Easy Retrofit Compatibility | Fits between existing studs without structural modifications — perfect for renovations. |
Pro Tip: Use sound-dampening insulation before installing drywall — blocking noise at the framing stage is far more effective (and cheaper) than fixing it later.
2. Add Resilient Channels or Sound Isolation Clips
Sound travels through vibration — from studs, joists, and drywall into the air. The best way to stop that transfer is by breaking the connection altogether. That’s where resilient channels and sound isolation clips come in. They “decouple” drywall from framing, preventing vibrations from moving through the wall structure. This upgrade provides professional-level soundproofing without adding extra wall thickness.
- Install between studs and drywall: Creates a flexible air gap that absorbs and disrupts impact noise.
- Combine with acoustic insulation: When paired with mineral wool, performance can nearly double.
- Works on ceilings too: Reduces footstep and floor impact noise from above.
- Lightweight system: Adds minimal bulk while achieving major acoustic gains.
- Durable steel design: Long-lasting, corrosion-resistant hardware.
| Feature | Benefit |
|---|---|
| Resilient Channels / Isolation Clips | Breaks vibration paths and prevents sound transfer through framing. |
| Air Gap Design | Creates separation between drywall and studs for superior sound absorption. |
| Combined with Insulation | Boosts total sound transmission loss by up to 15–20 dB. |
| Ceiling Compatibility | Reduces overhead noise, ideal for basement ceilings under living areas. |
| Lightweight Installation | Easy to retrofit without structural changes or major wall thickness increase. |
Pro Tip: Don’t over-tighten screws when attaching drywall — doing so transfers vibration directly to the studs and defeats the entire isolation effect.

3. Use Acoustic Drywall or Mass-Loaded Vinyl (MLV)
When it comes to serious sound blocking, density matters. Acoustic drywall and mass-loaded vinyl (MLV) add mass and density — two key factors in reducing sound transmission through walls, ceilings, and floors. MLV is especially versatile, working behind drywall or even under flooring layers for hidden but powerful soundproofing performance.
- STC Ratings: Up to 60 when combined with quality insulation and resilient channels.
- Installation: MLV sheets can be stapled, nailed, or glued behind drywall, then sealed at seams with acoustic caulk.
- Best Uses: Perfect for home theaters, studios, or between living areas for privacy and comfort.
- Flexible application: Easy to retrofit during remodeling or upgrades.
- Moisture resistance: Safe for basement conditions where humidity can be an issue.
| Feature | Benefit |
|---|---|
| Acoustic Drywall / MLV | Adds mass to block airborne noise effectively. |
| High STC Rating (Up to 60) | Excellent for separating noisy and quiet spaces like gyms or theaters. |
| Seam Sealing with Acoustic Caulk | Ensures no gaps for sound to leak through, maximizing performance. |
| Moisture-Resistant Construction | Ideal for below-grade areas where humidity may occur. |
| Flexible Installation | Fits easily behind drywall or beneath flooring without major reconstruction. |
Pro Tip: For maximum results, use double drywall with Green Glue between layers — it transforms sound energy into heat, reducing vibration dramatically.

4. Seal Every Gap and Crack
Even the most advanced insulation won’t work if sound can leak through small openings. Air gaps around outlets, light fixtures, ductwork, and trim allow noise to slip right through your walls. Sealing every opening with acoustic sealant is a simple but critical step — it’s flexible, durable, and specifically engineered for long-term sound control.
- Use acoustic caulk, not silicone: Acoustic sealant stays flexible, maintaining the seal even as walls expand or contract.
- Seal outlets, HVAC vents, and trim: Anywhere air can pass, sound can too — even hairline gaps.
- Weatherstrip doors: Eliminates noise leaks while improving thermal insulation.
- Foam seal gaskets: Great for outlet boxes and switch plates in sound-sensitive rooms.
- Check joints annually: Reapply if needed to maintain peak performance.
| Feature | Benefit |
|---|---|
| Acoustic Caulk (Flexible Sealant) | Blocks sound paths and remains flexible over time for long-term performance. |
| Sealed Outlets and Fixtures | Eliminates hidden sound leaks that weaken wall soundproofing. |
| Weatherstripped Doors | Improves both noise reduction and energy efficiency. |
| Foam Gaskets for Outlets | Provide an extra layer of sound insulation in small but critical areas. |
| Annual Maintenance | Ensures seals stay intact as materials naturally expand and settle. |
Pro Tip: Even a single unsealed vent or outlet box can reduce soundproofing effectiveness by up to 50% — seal every opening thoroughly to protect your investment.
5. Install Solid-Core Doors
Your door can make or break your soundproofing strategy. Hollow-core doors — the kind found in most homes — are lightweight and allow sound to pass through easily. Replacing them with solid-core doors is one of the simplest and most effective upgrades you can make. The added density blocks up to 50% more sound, instantly improving privacy in offices, theaters, or studios.
- Choose doors with perimeter seals: Blocks air gaps and prevents vibration leaks around the edges.
- Add a door sweep: Seals the gap at the bottom of the door where sound often escapes.
- Best for: Home offices, theaters, and recording rooms where noise control matters most.
- Upgrade hinges and frames: Heavy-duty hardware reduces rattling and improves durability.
- Finish with weatherstripping: Creates a complete acoustic barrier around the frame.
| Feature | Benefit |
|---|---|
| Solid-Core Construction | Provides superior density and mass for blocking airborne noise. |
| Perimeter Seals | Prevents air and sound leakage around the door edges. |
| Door Sweep or Drop Seal | Stops noise from escaping through the bottom gap — a common weak point. |
| Reinforced Hardware | Reduces rattling and enhances overall sound isolation. |
| Weatherstripping | Completes the sound barrier and boosts energy efficiency. |
Pro Tip: Install an automatic drop seal that lowers when the door closes — it seals the threshold tightly while allowing smooth opening and closing.

6. Carpet, Rugs, and Acoustic Flooring
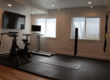
Hard floors bounce and amplify sound — especially in unfinished basements. To absorb noise and prevent echo, layer soft, flexible materials underfoot. Carpet tiles, cork, and acoustic underlayment dramatically reduce both impact noise (footsteps, dropped objects) and airborne echo. The result: a space that feels warm, quiet, and professionally finished.
- Underlayment: Adds cushion beneath flooring and prevents vibration transfer between concrete and surface layers.
- Carpet tiles: Stylish, replaceable, and effective at dampening sound — ideal for offices or rec rooms.
- Cork or vinyl planks: Naturally resilient and sound-dampening, perfect for home theaters or gyms.
- Area rugs: Add warmth and absorb mid- to high-frequency sounds easily.
- Acoustic underpad: A hidden layer that boosts performance without changing aesthetics.
| Feature | Benefit |
|---|---|
| Acoustic Underlayment | Reduces vibration and prevents noise transfer between subfloors. |
| Carpet Tiles | Provide modular, easy-to-replace sound absorption for high-traffic zones. |
| Cork or Vinyl Planks | Offer a stylish yet functional surface that softens footsteps and echoes. |
| Area Rugs | Add immediate acoustic absorption and aesthetic warmth to hard floors. |
| Acoustic Underpad | Hidden soundproofing layer that enhances comfort and noise control. |
Pro Tip: Combine soft textures — rugs, curtains, and upholstery — for balanced acoustics that absorb excess sound without making the room feel “dead.”
7. Acoustic Panels and Foam Treatments
Soundproofing stops noise from escaping or entering, but acoustic treatment makes what you hear inside sound better. Installing acoustic panels or foam treatments absorbs echo and reverberation, improving clarity for music, calls, or dialogue. This is especially valuable in home offices, theaters, or gaming setups where crisp sound matters.
- Wall-mounted panels: Best placed behind desks, speakers, or seating areas to absorb direct reflections.
- Ceiling clouds or foam tiles: Capture overhead echoes in larger or open layouts.
- DIY fabric panels: Cost-effective, customizable, and great for matching décor.
- Diffusers: Scatter sound instead of absorbing it, keeping natural liveliness in the room.
- Panel thickness: Choose 2” or thicker foam for mid-to-low frequency absorption.
| Feature | Benefit |
|---|---|
| Wall-Mounted Acoustic Panels | Absorb sound reflections and reduce echo in key listening areas. |
| Ceiling Clouds / Foam Tiles | Target vertical sound reflections for complete acoustic coverage. |
| DIY Fabric Panels | Affordable, customizable solution that blends aesthetics with performance. |
| Sound Diffusers | Maintain room liveliness while improving sound balance. |
| Thicker Foam Options (2”+) | Better at absorbing mid- and low-frequency sounds for full-spectrum control. |
Pro Tip: Choose panels that double as décor — printed acoustic art or colored hex tiles keep your soundproofing visually appealing and functional.
8. Soundproof the Ceiling
The basement ceiling is often the biggest sound leak in the entire space. Noise from upstairs — footsteps, voices, TVs — travels easily through floor joists and subfloor gaps. To stop this, combine multiple layers of isolation: resilient channels, dense insulation, and double drywall. Together, these create a high-performance sound barrier that keeps peace both upstairs and below.
- Use rockwool between joists: Fills air cavities and dampens airborne noise.
- Add acoustic clips or hat channels: Breaks vibration paths between framing and ceiling panels.
- Finish with ⅝” drywall + Green Glue: Creates a dense, energy-absorbing ceiling system.
- Seal all penetrations: Light fixtures and vents must be caulked to maintain integrity.
- Optional second layer: Doubling drywall adds extra mass for professional-grade silence.
| Feature | Benefit |
|---|---|
| Rockwool Insulation | Absorbs airborne and impact noise between floor joists. |
| Resilient Channels / Hat Clips | Decouple drywall from structure, preventing vibration transfer. |
| Double ⅝” Drywall + Green Glue | Creates dense, layered barrier that converts sound into heat energy. |
| Sealed Penetrations | Eliminates leaks through recessed lights, vents, or fixtures. |
| Optional Carpet or Mats Above | Further reduces upstairs footfall noise for dual-level comfort. |
Pro Tip: For maximum results, add carpet or soundproofing mats on the upper floor — they absorb impact noise before it even reaches the ceiling below.
9. Treat HVAC Noise
HVAC systems can be one of the sneakiest noise culprits in a basement remodel. Ductwork acts like a megaphone, carrying vibration and airflow noise throughout the house. To quiet it, focus on acoustic duct liners, flexible connectors, and baffled vents. These reduce hum, rattle, and “air rush” sounds for a more peaceful environment.
- Line ducts with acoustic insulation: Absorbs sound energy before it leaves the vent.
- Install flexible connectors: Interrupts vibration transfer between ducts and framing.
- Use baffled vents: Softens airflow noise and prevents whistling.
- Seal joints tightly: Leaky ducts amplify noise and reduce efficiency.
- Strategic layout: Keep returns and main trunks away from quiet zones like offices or theaters.
| Feature | Benefit |
|---|---|
| Acoustic Duct Liners | Absorb airflow noise and reduce system echo. |
| Flexible Connectors | Break vibration paths between HVAC equipment and framing. |
| Baffled Vents | Diffuse air movement and reduce hissing or whistling sounds. |
| Sealed Duct Joints | Eliminate air leaks that amplify noise and reduce efficiency. |
| Strategic Vent Placement | Keeps quiet spaces isolated from HVAC vibration zones. |
Pro Tip: Keep HVAC returns and main trunks away from shared walls with offices, bedrooms, or theaters — isolation starts with layout.
10. Test and Tune Your Space
Once your soundproofing work is complete, testing is essential. Every space behaves differently acoustically, so fine-tuning ensures optimal performance. Simple tools — like a decibel meter app or test audio tracks — can help identify problem spots before furniture and décor go in.
- Use a decibel meter app: Measure sound levels before and after treatment to confirm improvements.
- Reinforce problem areas: Corners, vents, and outlets often need a bit more sealant or padding.
- Fine-tune with furniture: Soft furnishings, curtains, and rugs balance reflections naturally.
- Test under real conditions: Play movies, music, or gym sounds to see where leaks remain.
- Document the setup: Photos and notes help with future upgrades or resale explanations.
| Feature | Benefit |
|---|---|
| Decibel Meter Testing | Quantifies your soundproofing success and identifies weak spots. |
| Targeted Reinforcement | Fixes leaks or thin areas without full reconstruction. |
| Acoustic Furniture Placement | Improves room balance and reduces reflections. |
| Real-World Sound Scenarios | Ensures practical performance, not just lab-level isolation. |
| Setup Documentation | Simplifies future modifications and adds professional credibility. |
Pro Tip: Keep a short log of sound readings and materials used — it proves your upgrades work and helps guide future refinements.
Soundproofing Cost Breakdown
According to HomeAdvisor, basement soundproofing typically costs between $1,036 and $2,717, depending on materials, square footage, and complexity. Full-scale theaters or recording studios can exceed $10,000 for advanced acoustic design.
| Feature | Average Cost (USD) | Notes |
|---|---|---|
| Rockwool or Acoustic Insulation | $1.50 – $3.00 per sq ft | Best for walls and ceilings. |
| Resilient Channels or Isolation Clips | $1.00 – $2.50 per sq ft | Decouples drywall for major noise reduction. |
| Acoustic Drywall or MLV | $2,000 – $5,000 | High-mass materials for walls and ceilings. |
| Acoustic Panels & Foam | $500 – $2,500 | Interior sound absorption and echo control. |
| Solid-Core Doors & Seals | $400 – $1,200 | Essential for blocking airborne noise. |
| Total Estimated Range | $1,500 – $10,000+ | Varies by design, square footage, and desired performance. |
Remodeling Tips Before You Start
- Address moisture first: Always waterproof before soundproofing.
- Plan wiring early: Run cables before closing walls or adding MLV.
- Check local codes: Fire-rated materials may be required for insulation and drywall.
- Combine methods: Insulation + decoupling + sealing = professional-grade results.
- Work with pros: Expert contractors ensure safety and code compliance while achieving maximum STC ratings.
Silence Starts Here
Whether you’re building a private cinema, recording studio, or quiet workspace, soundproofing transforms your basement into a truly livable, professional environment. Done right, it improves comfort, privacy, and property value — and once you experience the silence, there’s no going back.
Pro Worx Construction specializes in basement finishing, home theaters, and custom remodels built for sound, comfort, and performance. From insulation to acoustic drywall and lighting design, we make sure your basement not only looks great — it sounds incredible.
Get a Free Quote from Pro Worx Construction
Your dream space deserves silence. Let’s build it.
Frequently Asked Questions
What’s the best soundproofing material for basements?
Rockwool insulation and mass-loaded vinyl offer top-tier sound control for walls and ceilings.
Can I soundproof an existing basement?
Yes. Add acoustic panels, carpet, and seal gaps with acoustic caulk to reduce noise without full demolition.
How much does it cost to soundproof a basement?
Most projects range from $1,500 to $10,000 depending on materials and layout.
Does soundproofing help with upstairs noise?
Absolutely. Ceiling insulation, resilient channels, and solid-core doors all reduce footstep and vibration noise.
Is soundproofing worth it for a home theater?
Yes. It enhances sound clarity, prevents echo, and stops noise from escaping to other parts of the house.