1. Ignoring Moisture and Waterproofing
The #1 reason basement remodels fail isn’t poor design — it’s moisture.
Even a small leak can lead to mold, warped flooring, and destroyed drywall. Many homeowners try to save money by skipping professional waterproofing, but that decision almost always costs more in the long run.
Before finishing a basement, proper waterproofing is non-negotiable.
| Warning Sign | What It Means | Recommended Fix |
|---|---|---|
| Musty smell or mildew | Moisture trapped behind walls or under flooring. | Install a vapor barrier and use a dehumidifier rated for basements. |
| Efflorescence (white residue on concrete) | Water seeping through foundation walls and evaporating salts. | Seal cracks, apply waterproof coatings, and inspect exterior drainage. |
| Damp or discolored walls | Active water intrusion or condensation due to poor sealing. | Install interior perimeter drains or a sump pump to redirect water. |
- Fix it first: Add vapor barriers, seal foundation cracks, and install a sump pump if needed.
- Pro upgrade: Professional waterproofing with drainage mats and sealed subfloors provides long-term peace of mind.
Pro Tip: Always complete waterproofing and moisture testing before framing or insulation — not after. It’s far cheaper to fix a small leak now than to rip out finished drywall later.
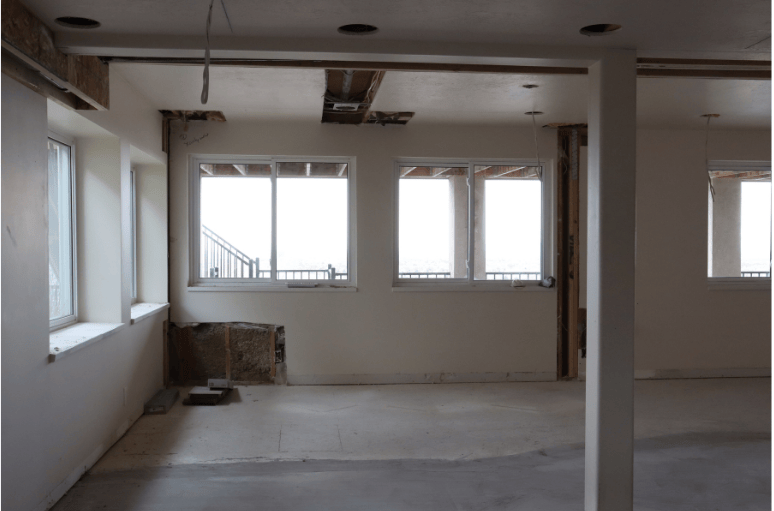
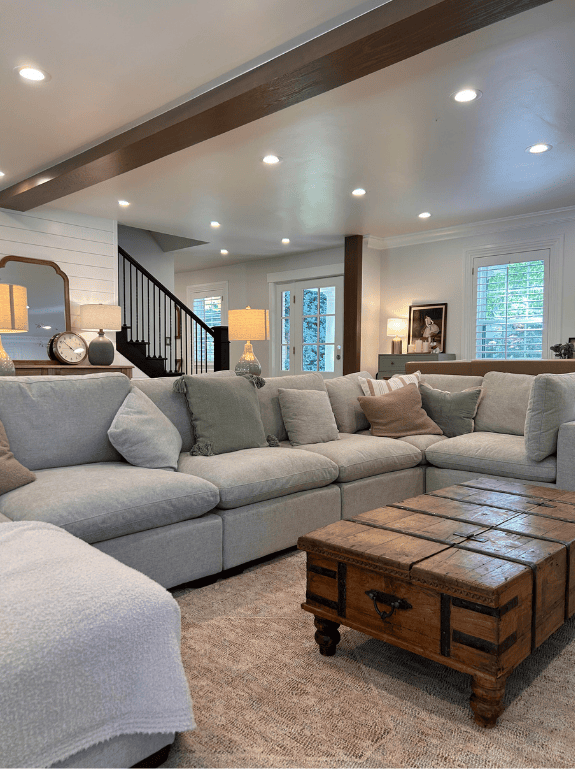
2. Forgetting About Ceiling Height
Low ceilings are one of the biggest design limitations in basement remodeling. Building codes usually require at least 7 feet of clearance — but if you want your basement to feel open and luxurious instead of cramped, aim for more whenever possible.
Ceiling height affects not only comfort but also lighting, airflow, and resale value. Smart design choices can make even tight basements feel taller and more inviting.
| Challenge | Impact on Design | Smart Solution |
|---|---|---|
| Ceilings under 7 feet | Limits your ability to add lighting, ducts, or soundproofing. May not meet building code. | Excavate to lower the floor or choose low-profile materials to gain clearance. |
| Bulky light fixtures | Visually lower the ceiling and create harsh shadows. | Use recessed or flush-mount LED lighting to keep the line of sight clear. |
| Dark ceiling paint | Absorbs light and makes ceilings feel lower than they are. | Opt for soft white, cream, or pale gray finishes to visually raise height. |
| Visible beams or ductwork | Can clutter the space or make it feel industrial if not styled intentionally. | Expose beams for a loft look or paint them to match the ceiling for cohesion. |
- Fix: Use recessed lighting instead of bulky fixtures to keep ceilings feeling higher.
- Trick: Expose beams or paint ceilings a light, reflective color to visually lift the space.
- Alternative: Lower the flooring slightly instead of raising ceilings if structural changes are needed.
Pro Tip: If you’re adding HVAC ducts, soundproofing, or ceiling insulation, plan for their height loss before construction starts. Losing even 4–6 inches can make or break whether your basement passes code — and whether it feels like a cozy living space or a cramped bunker.
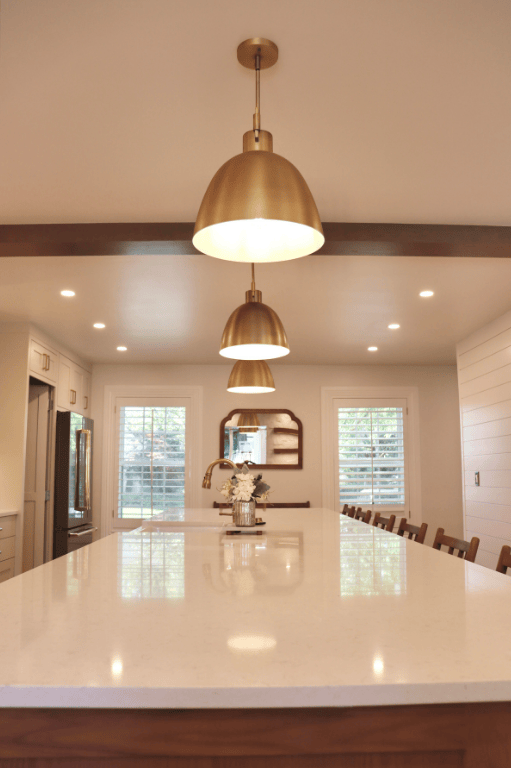
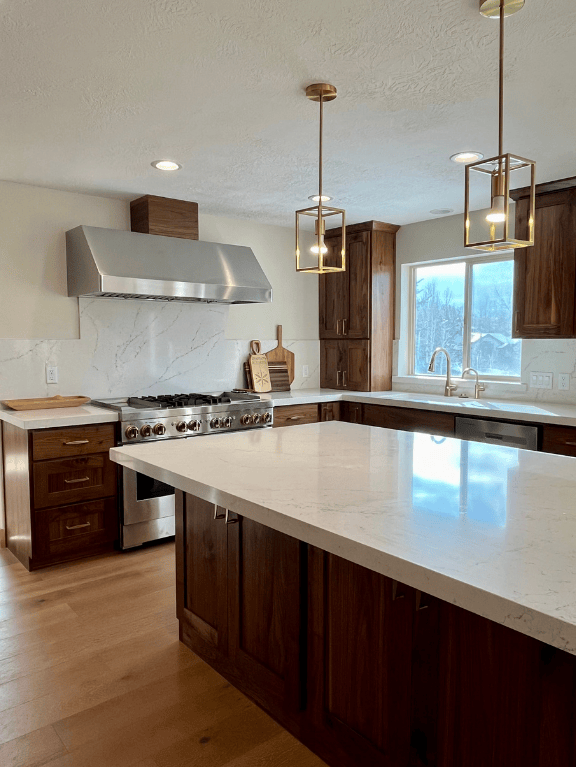
3. Poor Lighting Design
Most basements start out feeling more like caves than living spaces — dark, unevenly lit, and uninviting. Relying on a few overhead bulbs isn’t enough.
Lighting is one of the most transformative elements in a basement remodel — it determines not just visibility, but mood, comfort, and resale appeal.
A well-lit basement feels like a natural extension of your home, while poor lighting instantly screams “unfinished.”
| Lighting Type | Purpose | Recommended Options |
|---|---|---|
| Ambient Lighting | Provides overall illumination and sets the base brightness for the room. | Recessed LED can lights, flush-mount ceiling fixtures, or dimmable track lighting. |
| Task Lighting | Targets specific work areas like desks, bars, laundry zones, or reading corners. | Under-cabinet strips, desk lamps, pendant lights above counters, or adjustable sconces. |
| Accent Lighting | Adds depth, highlights artwork, and enhances architectural features. | Wall sconces, LED uplights, stair tread lights, or niche spotlights. |
| Natural Lighting | Improves airiness and reduces reliance on artificial light. | Install egress windows, window wells, or reflective light wells to draw in sunlight. |
- Layered lighting: Combine ambient, task, and accent lighting to make your basement feel like a true living space.
- Natural light: Add egress windows or window wells wherever possible to brighten and open up the area.
- Color temperature: Use 3000K–3500K LED bulbs for a warm, welcoming glow that mimics daylight.
Pro Tip: Plan your lighting alongside your furniture placement, ceiling design, and wall finishes — not after drywall goes up. A little forethought can turn a dark, forgotten basement into your home’s most comfortable room.
4. Skipping Soundproofing
Basements naturally amplify noise — and without proper soundproofing, you’ll hear every treadmill thump, movie explosion, or Zoom call echoing through the floor above.
If your basement will include a home theater, gym, office, or guest suite, sound control isn’t optional — it’s essential. Once drywall goes up, fixing noise problems later becomes expensive and messy.
| Problem | Cause | Recommended Solution |
|---|---|---|
| Footsteps and noise from above | Sound waves travel through open joists and drywall gaps. | Install acoustic insulation and resilient channels between floors. |
| Echo inside the basement | Hard surfaces reflect sound and amplify noise. | Add rugs, drapes, and upholstered furniture to absorb sound waves. |
| Noise bleeding through shared walls | Insufficient insulation or single drywall layers. | Upgrade to double drywall with sound-damping compound or Rockwool insulation. |
- Solutions: Acoustic insulation, resilient channels, and double drywall for serious noise reduction.
- Quick fix: Add thick rugs, curtains, and upholstered furniture to soften sound naturally.
- Pro upgrade: Rockwool insulation offers superior sound absorption and fire resistance.
Pro Tip: You can’t easily retrofit soundproofing later — plan it early, ideally during the framing and insulation phase.
5. Not Planning for HVAC & Ventilation
Even the most beautiful basement remodel will feel damp, stuffy, or unlivable if air circulation isn’t handled properly.
Basements are notorious for poor airflow and higher humidity, so extending your home’s HVAC system (or adding a dedicated one) is crucial for comfort, air quality, and long-term durability.
| Issue | Impact | Solution |
|---|---|---|
| Uneven temperatures | Basement stays cooler or warmer than the rest of the home. | Extend HVAC ducts or install mini-split systems for independent control. |
| Poor air circulation | Air stagnates, leading to odor or moisture buildup. | Add supply and return vents to balance airflow and improve air exchange. |
| High humidity | Can cause condensation, mold, and peeling finishes. | Install a built-in dehumidifier or use a smart portable unit with drain hose. |
- Upgrade ducts: Extend your existing HVAC system to maintain even temperatures throughout the home.
- Install vents or returns: Ensures balanced airflow and fresh air circulation.
- Add a dehumidifier: Prevents mold, protects finishes, and keeps the air feeling fresh.
Pro Tip: Consider creating separate climate zones — one thermostat for upstairs and one for the basement. It’s a small investment that dramatically improves comfort and efficiency.
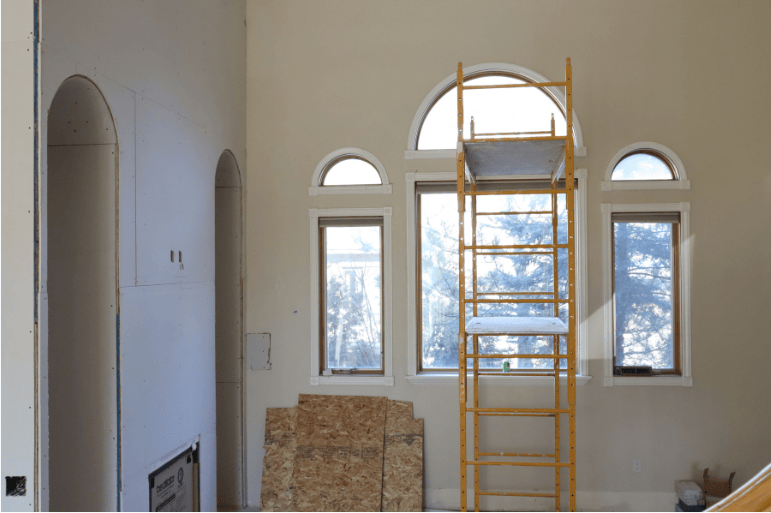
6. Overlooking Egress & Safety Codes
This is one of the biggest — and costliest — mistakes homeowners make.
If your basement includes a bedroom, office, or living area, you must meet egress and safety requirements to pass inspection.
An egress window or exterior door isn’t just about compliance — it’s about safety, resale value, and peace of mind.
| Requirement | Minimum Standard | Added Benefits |
|---|---|---|
| Egress Window | Minimum 5.7 sq. ft. opening, max sill height 44 inches from floor. | Improves safety, natural light, and overall home value. |
| Egress Door | Direct exit path to outside, must meet fire escape standards. | Ideal for basement apartments or private guest suites. |
| Window Well | If deeper than 44 inches, must include a ladder or steps. | Decorative options can enhance curb appeal and landscaping. |
- Requirements: Bedrooms and habitable areas below grade must have at least one egress window or door.
- Benefit: Adds natural light, improves ventilation, and boosts resale value by making the space code-compliant.
- Pro upgrade: Decorative window wells with stone or brick finishes can turn a code requirement into a design feature.
Pro Tip: Always have your remodeler verify egress and safety code compliance before framing — not after. Retrofitting a window well later can easily add thousands to your project.
7. Choosing the Wrong Flooring
Basement flooring faces more stress than any other part of your remodel — from ground moisture to fluctuating temperatures.
What looks great in a showroom might fail fast underground. For example, hardwood swells and warps, while carpet can trap moisture and develop that unmistakable “basement smell.”
Your flooring needs to be stylish, durable, and moisture-resistant — not just comfortable.
| Flooring Type | Pros | Cons |
|---|---|---|
| Luxury Vinyl Plank (LVP) | Waterproof, durable, affordable, and mimics real wood or tile. | Can feel slightly cold without underlayment or radiant heat. |
| Engineered Wood | Has a real wood surface with better moisture tolerance than solid hardwood. | Still sensitive to humidity and needs a vapor barrier underneath. |
| Tile or Porcelain | Extremely durable, water-resistant, and perfect for radiant heating systems. | Cold underfoot without heating and harder to install. |
| Carpet | Soft and cozy, great for theater rooms or bedrooms. | Prone to trapping moisture and odors unless you use moisture-resistant padding. |
- Best options: Luxury vinyl plank (LVP), engineered wood, or tile for durability and water resistance.
- Skip: Solid hardwood, cheap laminate, or standard carpet — all risk moisture damage.
- Pro upgrade: Radiant floor heating under LVP or tile adds warmth and luxury without maintenance.
Pro Tip: Always install a moisture barrier beneath your flooring — even “waterproof” types. It’s your best defense against future warping or mold.
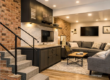
8. Bad Layout Flow
A basement remodel should feel like a seamless extension of your home — not an afterthought.
Poor layout flow is one of the easiest ways to make even a large basement feel cramped or confusing.
Think about how people will move between rooms, how light travels through the space, and where you’ll actually spend your time.
| Design Mistake | Effect | Smart Fix |
|---|---|---|
| Too many walls or doors | Breaks up natural light and creates dark, tight spaces. | Opt for open-concept layouts that connect entertainment and lounge zones. |
| No zoning | Noise overlaps between quiet and active areas. | Place offices and bedrooms away from gyms or home theaters. |
| Ignoring plumbing location | Drives up cost by relocating drains and water lines. | Locate bathrooms or wet bars near existing plumbing stacks. |
- Open-concept design: Combine living, gaming, and entertainment zones for better flow and light distribution.
- Zone by use: Keep quiet areas (bedrooms, office) separate from active zones (gym, theater, bar).
- Keep plumbing in mind: Place baths or bars near existing drains to save thousands in construction costs.
Pro Tip: Work with your design-build team to plan furniture and lighting before framing begins. A few inches on paper can make or break flow in real life.
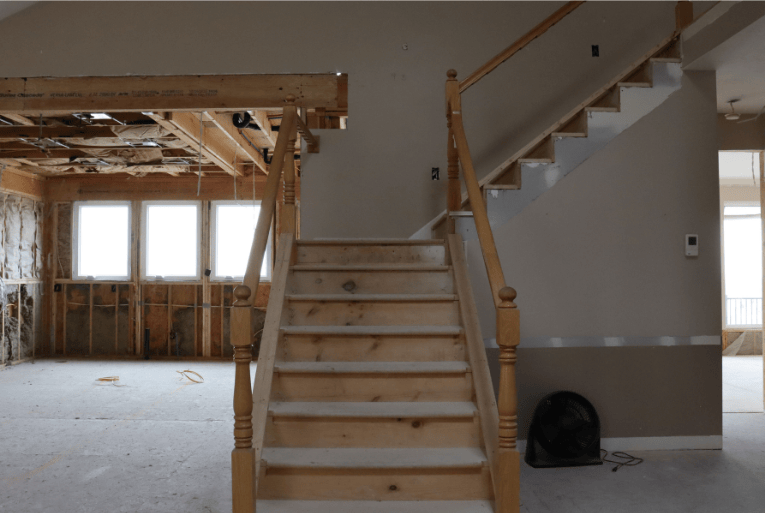
9. DIYing Complex Systems
There’s a time and place for DIY — and it’s not your basement’s electrical or plumbing.
Basement systems are complex, and mistakes can mean code violations, insurance issues, or even safety hazards.
It’s always cheaper to hire licensed pros upfront than to redo failed inspections later.
| System | Why It’s Risky to DIY | Hire a Professional For |
|---|---|---|
| Electrical | Incorrect wiring can cause fire hazards or fail inspection. | Lighting layouts, outlets, and panel connections. |
| Plumbing | Leaks or wrong slope can lead to flooding or mold growth. | Installing new bathrooms, sump pumps, or wet bars. |
| HVAC | Improper vent sizing or placement causes condensation and poor airflow. | Extending ducts, adding returns, or zoning climate systems. |
- Hire licensed trades: Electrical, plumbing, and HVAC all have safety and code requirements.
- Ask for permits: They protect your home’s resale value and your insurance coverage. If you are a Utah resident be sure to educated yourself on permit applications.
- Save DIY for decor: Paint, shelving, and finishing touches are safe and rewarding.
Pro Tip: If your contractor avoids pulling permits — that’s a major red flag. Run.
10. Cutting Corners on Finishes
The final 10% of your remodel defines 100% of the impression it leaves.
Even the best structural work can look sloppy with cheap trim, patchy paint, or mismatched fixtures.
You don’t need to spend a fortune — just choose durable, consistent materials and give details the time they deserve.
| Finish Element | Budget-Friendly Upgrade | Why It Matters |
|---|---|---|
| Hardware & Fixtures | Swap builder-grade knobs and faucets for matte black, brass, or brushed nickel. | Small upgrades give a custom, high-end look. |
| Paint & Trim | Use semi-gloss or washable matte finishes; caulk and sand trim for perfection. | Polished edges elevate the entire room. |
| Flooring & Cabinets | Choose waterproof materials and consistent tones across rooms. | Creates a cohesive, professional finish that increases resale value. |
- Upgrade selectively: Invest where it shows — hardware, lighting, and faucets have the biggest visual payoff.
- Use durable materials: Waterproof paint, LVP flooring, and solid cabinetry stand the test of time.
- Coordinate colors: Consistent finishes across spaces make the basement feel intentional, not pieced together.
Pro Tip: If your remodeler suggests “skipping” a finish for later, don’t. It almost always costs more to fix later — and the unfinished look will bug you every day until you do.
Average Cost of Common Basement Mistakes
Cutting corners rarely saves money. Here’s what the most common basement remodeling mistakes actually cost when you have to fix them later:
| Mistake | Average Repair Cost (USD) | Prevention Tip |
|---|---|---|
| Water Damage / Mold | $3,000 – $10,000 | Waterproof before finishing. |
| Code Violations | $1,000 – $5,000+ | Get proper permits from the start. |
| Bad Flooring Choice | $2,000 – $6,000 | Choose waterproof, temperature-stable options. |
| Poor Lighting Layout | $1,000 – $3,000 | Plan lighting with your layout early. |
| Improper HVAC | $2,000 – $8,000 | Add proper vents and returns. |
Final Thoughts: Plan Smart, Build Once
Basement remodeling is one of the best ways to expand livable space and increase property value — but only if it’s done right. Avoid these common pitfalls by planning ahead, hiring experienced professionals, and prioritizing long-term quality over shortcuts.
Pro Worx Construction specializes in custom basement remodels across Utah. From waterproofing and framing to luxury finishes, we’ll help you design and build a basement that lasts for decades — without costly surprises.
Get a Basement Design Consultation
Because the only thing worse than an unfinished basement is a poorly finished one.
Frequently Asked Questions
What’s the most common basement remodeling mistake?
Skipping waterproofing. It leads to mold, ruined finishes, and costly repairs later.
Can I remodel my basement myself?
You can DIY minor projects, but electrical, plumbing, and framing require professionals.
How do I choose the right flooring for a basement?
Pick moisture-resistant materials like vinyl plank, tile, or engineered wood.
How long does a basement remodel take?
Typically 8–14 weeks depending on design complexity, permits, and finishing details.
What should I check before hiring a contractor?
License, insurance, permits, timeline, and detailed written estimates.
Additional Resources:
Top 10 Basement Renovation Ideas
Cost to Finish a Basement in Utah